Public Documentation
- Welcome to Muchtall's Bookstack
- Ubuntu Template Image Preparation and Cloning
- Installing Docker on Ubuntu
- Debian Template Image Preparation and Cloning
- A Comparison of Common ESPHome-Compatible MMWave Prescence Sensors
- Getting AWS SSO to work with KeePass and Kee
- Tasmota Device Initial Setup
- Hollyland Lark A1 Quick-Start Guide
Welcome to Muchtall's Bookstack
Nothing much here to begin with, but eventually you will find pages for public consumption in the Public Documentation area.
Ubuntu Template Image Preparation and Cloning
About
Just some documentation I use to keep track of how to provision a new, fresh Ubuntu VM template on my homelab. Some values are going to differ in your environment, such as:
- Name
- Username
- Interface names (could vary as
enX0,ens160, etc depending on your hypervisor or lack thereof) - IP Addresses, Subnets, DNS servers, and search domains
Fresh Install of VM
Fresh Ubuntu Installation
- Select and hit enter on the Try or Install Ubuntu Server option (loads by default)
- Hit Enter, leaving the the default English option
- Hit Enter, leaving the defaults of English (US) and English (US)
- Hit Enter, leaving the default of Ubuntu Server
- Arrow up on the keyboard to enX0 eth and hit Enter
- Arrow down on the keyboard to Edit IPv4 and hit Enter
- Hit Enter on Automatic (DHCP) and then arrow down on the keyboard to select Manual, then hit Enter
- Tab between fields:
- Subnet: 192.168.160.0/23
- Address: 192.168.160.xxx (Choose a free temporary IP from IP Address Allocations)
- Gateway: 192.168.160.1
- Name Servers: 192.168.160.105, 8.8.8.8, 8.8.4.4
- Search domains: (blank)
- Save (hit Enter)
- Tab to Done and hit Enter
- Hit Enter, leaving the proxy set to blank
- Hit Enter to accept the default mirror
- Tab to Done and hit Enter to accept the defaults for the storage layout
- Arrow up to ubuntu-lv (aka "mounted at /") and hit Enter
- Select Edit and hit Enter
- Tab to Size and change the value to the same as is listed next to max (probably ~?.???G)
- Tab down to Save and hit Enter
- Tab down to Done and hit Enter
- Tab to Continue and hit Enter on the Confirm destructive action dialog
- Profile Setup
- Your Name: John Doe
- Your server's name: ubuntu2404 (or ubuntu24041 etc for newer revisions)
- Pick a username: jdoe
- Choose a password: (my standard)
- Confirm your password: (same)
- Tab to Done and hit Enter
- Hit Enter, leaving the Skip for now option selected on the Upgrade to Ubuntu Pro
- Hit Spacebar on the option to Install OpenSSH Server
- If you have a GitHub account, you can optionally add your public SSH key
- Tab to Done and hit Enter
- Tab to Done and hit Enter, leaving defaults of nothing selected on Featured Server Snaps
- Wait for the "Cancel update and reboot" option to go away, which will be replaced with Reboot now
Post-install Ubuntu Configuration
- Return to the Remote Console window and Power On the VM
- Once it comes up, SSH to your VM
-
Run any available upgrades and reboot
sudo apt update && sudo apt upgrade -y && sudo reboot - Reconnect via SSH
-
Set up Chrony for time sync
sudo apt install -y chrony && \ sudo systemctl restart chrony && \ chronyc tracking | grep --color=auto -e ^ -e "Last offset.*"
VIM Tweaks
While cool, some of the newer VIM plugins that come with Ubuntu can cause unexpected weirdness. Lets tweak the room VIM config so that it's less of a pain when doing a sudo vi
Apparently `sudoedit` is a thing. That loads your personal .vimrc while executing edits as root. In which case, if you use sudoedit, you may want to add these tweaks to your personal ~/.vimrc
-
Fix the auto-indentation of YAML when commenting out an existing line (for both your username and root)
cat << EOF >> ~/.vimrc " Fix auto-indentation for YAML files augroup yaml_fix autocmd! autocmd FileType yaml setlocal ts=2 sts=2 sw=2 expandtab indentkeys-=0# indentkeys-=<:> augroup END EOF sudo bash -c 'cat << EOF >> ~/.vimrc " Fix auto-indentation for YAML files augroup yaml_fix autocmd! autocmd FileType yaml setlocal ts=2 sts=2 sw=2 expandtab indentkeys-=0# indentkeys-=<:> augroup END EOF' - Set VIM as the default editor
sudo update-alternatives --config editor
Template Image Prep
Set up OpenSSH Key Reconfiguration
If you simply clone an Ubuntu image without resetting the OpenSSH server host keys, an attacker can take those host keys and perform a MITM SSH attack on any system that was cloned from the same image. So we have to make sure those are reset before we make the image, and then automatically regenerated on the next boot.
-
Copy/Paste/Run this entire chunk of script into your terminal (creates process that checks for missing keys at boot, and regenerates them if missing):
if [ `systemctl is-enabled openssh-reconfigure.service 2> /dev/null > /dev/null || true && false` ] ; then \ echo "OpenSSH Key Reconfiguration Service already installed." ; \ else sudo bash -c 'cat << EOF > /usr/local/sbin/openssh-reconfigure #!/bin/bash test -f /etc/ssh/ssh_host_dsa_key || dpkg-reconfigure openssh-server EOF' sudo chmod 700 /usr/local/sbin/openssh-reconfigure sudo bash -c 'cat << EOF > /etc/systemd/system/openssh-reconfigure.service [Unit] Description=OpenSSH Key Reconfiguration Service Before=ssh.service [Service] Type=simple ExecStart=/usr/local/sbin/openssh-reconfigure [Install] WantedBy=multi-user.target EOF' ; \ sudo chmod 644 /etc/systemd/system/openssh-reconfigure.service ; \ sudo systemctl enable openssh-reconfigure.service ; \ fi - Delete the existing keys
sudo /bin/rm -v /etc/ssh/ssh_host_*
Clear the Machine ID
-
Run this:
sudo bash -c "truncate -s0 /etc/machine-id ; \ rm /var/lib/dbus/machine-id ; \ ln -s /etc/machine-id /var/lib/dbus/machine-id"
Genericize the netplan config
-
Make these alterations to
/etc/netplan/50-cloud-init.yamlin theenX0section. Leave the comments for the image/template user to understand what needs to happen to re-activate networking
Ubuntu 24.04:link-local: [ ipv4 ] # Post-cloning, comment this out or remove #link-local: [ ] # Post-cloning, un-comment this line #addresses: # Post-cloning, un-comment this line #- 192.168.160.xxx/23 # Post-cloning, un-comment this line and set appropriatelySetting link-local allows the network interface to come up on boot, but without DHCP or a Static IP assigned. Additionally, setting link-local to a blank array ([ ]) after initial config disabled link-local addressing which can cause problems for default route handling in some cases.
Clear the Bash, VIM, and other history
-
Run this:
rm -rf ~/.viminfo ~/.Xauthority ~/.cache sudo bash -c 'rm -rf ~/.viminfo ~/.Xauthority ~/.cache' sudo bash -c 'echo -n "" > /var/log/wtmp' sudo bash -c 'echo -n "" > /var/log/btmp' sudo bash -c 'echo -n "" > /var/log/lastlog' ### These should always run last sudo bash -c 'truncate -s0 ~/.bash_history ; history -c' truncate -s0 ~/.bash_history ; history -c
Shutdown
-
Run this:
sudo shutdown -h now
Create the Template or Image
XCP-NG
Using XOA Xen Orchestra
- Go to Home → VMs
- Change the Filters to blank
- Click on your new VM
- Click on the name of the VM
- Change the name to:
TPL_U24.04_20240709172110TPLmeans this is a user-generated templateU24.04indicates this is Ubuntu Server 24.0420240709172110Indicates the revision date of THE DOCUMENT YOU ARE READING in UTC, ie 2024 July 9th, 17:21:10. This is used as a means of revision control.
- Click on Advanced
- Click Convert to template
- Click OK on the confirmation dialog
Cloning to a New VM
PVE
- Right-click on the prepped VM and select Convert to template
- Click Yes on the confirmation dialog
XCP-NG
Using XOA Xen Orchestra
- Go to Home → VMs
- Click New VM
- Select your pool
- Set...
- Template: (Type
TPL_Uto start auto-filling the options, and select your template) - Name: (Name of your choosing)
- Description: (Something descriptive like:
Docker server on Ubuntu 24.04) - VCPU: 16 (or whatever the number of cores is on the system)
- RAM: 16 GiB (or whatever you need)
- Topology: (Default behavior)
- Click Show advanced settings
- Uncheck Boot VM after creation
- If you wish to have this system auto-power-on when the host system/hypervisor reboots...
- Check Auto power on
- Template: (Type
- Click Create
- Click Disks
- Click the disk size in the Size column
- Increase the disk size to whatever your needs are
- You may optionally migrate the VDI to a faster SR or bulk data SR if desired by using the arrow button in the last column
- When you are finished, click the start button () at the top of the page
- Click the Console to watch the startup and proceed with initial configuration
Post-Cloning Configuration
- Log into the VM via the console
- Edit
/etc/netplan/50-cloud-init.yamland configure as appropriate to your use (reserve an IP from your firewall's DHCP pool).- Follow the instructions in the comments we made in the template
-
Apply the new netplan config
sudo netplan apply - SSH to the VM via the assigned IP using the account you created during initial installation and templating
-
Configure the hostname
sudo hostnamectl set-hostname myhostname - If you resized the disk, resize the filesystem
# Check the current partition configuration lsblk /dev/xvda | grep -e ^ -e ^xvda.* -e ".*─xvda3.*" # Resize xvda partition 3 to consume the available space sudo growpart /dev/xvda 3 # Re-check the current partition configuration lsblk /dev/xvda | grep -e ^ -e ^xvda.* -e ".*─xvda3.*" # Check the current Free PE on the partition sudo pvdisplay | grep -e ^ -e "Free PE.*" # If you do not see any free PE's, run sudo pvresize /dev/xvda3 # Then re-check the current Free PE on the partition sudo pvdisplay | grep -e ^ -e "Free PE.*" # Check the Free PE on the volume group sudo vgdisplay | grep -e ^ -e "Free PE.*" # Check the LV Size on the logical volume sudo lvdisplay | grep -e ^ -e "LV Size.*" # Resize the LV, increasing by the number of PE's available above sudo lvextend -l +7680 /dev/ubuntu-vg/ubuntu-lv # Re-check the LV Size on the logical volume sudo lvdisplay | grep -e ^ -e "LV Size.*" # Check the Free PE on the volume group, confirming we used all available PE's sudo vgdisplay | grep -e ^ -e "Free PE.*" # Check the filesystem Size df -h / # Resize the filesystem sudo resize2fs /dev/ubuntu-vg/ubuntu-lv # Re-check the filesystem to confirm larger Size df -h / - Optionally Install Docker
Installing Docker on Ubuntu
Install
- Run this:
### Everything below can be copy/pasted as a one-liner . /etc/os-release && \ sudo apt update && \ sudo apt install -y apt-transport-https ca-certificates curl software-properties-common && \ curl -fsSL https://download.docker.com/linux/ubuntu/gpg | sudo apt-key add - && \ sudo add-apt-repository "deb [arch=amd64] https://download.docker.com/linux/ubuntu $VERSION_CODENAME stable" && \ sudo apt update && \ sudo apt install -y docker-ce docker-compose && \ # Verify it's running sudo systemctl status docker -n 0 # Update (create if need be) the docker configuration to use the CGNAT CIDR range for container networking sudo apt install -y moreutils jq && \ sudo bash -c 'if [ ! -f "/etc/docker/daemon.json" ] ; then echo "{}" > /etc/docker/daemon.json ; fi ; jq '\''."default-address-pools"[0].base = "100.64.0.0/16" | ."default-address-pools"[0].size = 24'\'' /etc/docker/daemon.json | sponge /etc/docker/daemon.json' ; cat /etc/docker/daemon.json # Restart docker to pull in changes sudo systemctl restart docker # Set up cron task to clean up stale, unused docker images sudo bash -c 'cat << EOF > /etc/cron.daily/docker-image-prune #!/bin/bash ### Prune images older than 7 days docker image prune -af --filter "until=$((7*24))h" 2> /dev/null > /dev/null EOF ' sudo chmod u+x /etc/cron.daily/docker-image-prune
Per-admin first-time setup
For each local user you want to grant docker access (such as your own user)...
- Run this:
# Add yourself to the Docker group sudo usermod -aG docker ${USER} # Disconnect and reconnect to apply permissions OR start a new privileged shell... sudo su - ${USER}The above only has to be run once. After that, you have persistent access every time you log in.
Optional Install of Portainer
Gives users an approachable GUI to manage containers
-
Install via docker-compose
sudo mkdir -p /opt/docker-compose/portainer cd /opt/docker-compose/portainer sudo vi docker-compose.yaml - Paste in the following and save/exit:
services: portainer: image: portainer/portainer-ce restart: always ### Generated with: # docker run --rm httpd:2.4-alpine htpasswd -nbB admin 'YOUR_PASSWORD_HERE' | cut -d ":" -f 2 | sed -Ee 's/\$/\$\$/g' command: --admin-password '$$2y$$05$$_CHANGE_THIS_HASH_USING_THE_OUTPUT_FROM_THE_COMMAND_ABOVE' ports: - "9000:9000" - "9443:9443" - "8000:8000" volumes: - portainer_data:/data - /var/run/docker.sock:/var/run/docker.sock volumes: portainer_data: - Set the admin password
ADMIN_PW_HASH=$(docker run --rm httpd:2.4-alpine htpasswd -nbB admin "`read -p "Enter your new admin password: " -s i ; echo $i`" | cut -d ":" -f 2 | sed -Ee 's/\$/\$\$/g') ; echo "" ; \ echo $ADMIN_PW_HASH | sed -Ee 's/\$/\\$/g' | sed -Ee 's/\//\\\//g' | sudo sed -Ee "s/--admin-password '[^']*'/--admin-password '"`cat -`"'/g" -i docker-compose.yaml - Run:
docker compose up -d && docker compose logs -fYou can stop the log output with Ctrl+C
- Open the UI via https://your.hostname.or.ip:9443/
- Bypass the invalid cert warning
- Login with the admin password you set above
Debian Template Image Preparation and Cloning
ROUGH DRAFT
Fresh Install of VM
Fresh Debian Installation
To be documented
Post-install Ubuntu Configuration
- Go to the Console tab and Power On the VM
- Once it comes up, login to your VM
- Get the VM IP:
ip addr - SSH to the VM and login as your unprivileged user
- su to root (enter the root password)
su - - Edit sources.list
deb http://deb.debian.org/debian bookworm main non-free-firmware deb-src http://deb.debian.org/debian bookworm main non-free-firmware deb http://security.debian.org/debian-security bookworm-security main non-free-firmware deb-src http://security.debian.org/debian-security bookworm-security main non-free-firmware deb http://deb.debian.org/debian bookworm-updates main non-free-firmware deb-src http://deb.debian.org/debian bookworm-updates main non-free-firmware - Install sudo and add your user to sudo group
apt-get install sudo usermod -aG sudo johndoe - Logout and reconnect via SSH
-
Run any available upgrades and reboot
sudo apt update && sudo apt upgrade -y && sudo reboot -
Set up Chrony for time sync
sudo apt install -y chrony && \ sudo systemctl restart chrony && \ chronyc tracking | grep --color=auto -e ^ -e "Last offset.*" - Add /usr/sbin to default PATH
sudo bash -c 'echo '\''PATH="/usr/sbin:$PATH"'\'' >> /etc/profile.d/usr_sbin_path.sh'
VIM Tweaks
- Install VIM basic
sudo apt install vim - Set VIM as the default editor
sudo update-alternatives --config editor
Template Image Prep
Set up OpenSSH Key Reconfiguration
If you simply clone a Debian image without resetting the OpenSSH server host keys, an attacker can take those host keys and perform a MITM SSH attack on any system that was cloned from the same image. So we have to make sure those are reset before we make the image, and then automatically regenerated on the next boot.
-
Copy/Paste/Run this entire chunk of script into your terminal (creates process that checks for missing keys at boot, and regenerates them if missing):
if [ `systemctl is-enabled openssh-reconfigure.service 2> /dev/null > /dev/null || true && false` ] ; then \ echo "OpenSSH Key Reconfiguration Service already installed." ; \ else sudo bash -c 'cat << EOF > /usr/local/sbin/openssh-reconfigure #!/bin/bash test -f /etc/ssh/ssh_host_dsa_key || dpkg-reconfigure openssh-server EOF' sudo chmod 700 /usr/local/sbin/openssh-reconfigure sudo bash -c 'cat << EOF > /etc/systemd/system/openssh-reconfigure.service [Unit] Description=OpenSSH Key Reconfiguration Service Before=ssh.service [Service] Type=simple ExecStart=/usr/local/sbin/openssh-reconfigure [Install] WantedBy=multi-user.target EOF' ; \ sudo chmod 644 /etc/systemd/system/openssh-reconfigure.service ; \ sudo systemctl enable openssh-reconfigure.service ; \ fi - Delete the existing keys
sudo /bin/rm -v /etc/ssh/ssh_host_*
Clear the Machine ID
-
Run this:
sudo bash -c "truncate -s0 /etc/machine-id ; \ rm /var/lib/dbus/machine-id ; \ ln -s /etc/machine-id /var/lib/dbus/machine-id"
Genericize the interface config
-
Make these alterations to
/etc/network/interfacesin theenX0section. Leave the comments for the image/template user to understand what needs to happen to re-activate networkingiface enX0 inet dhcp #iface enX0 inet static # address 192.168.160.XXX # netmask 255.255.254.0 # gateway 192.168.160.1 # dns-nameservers 192.168.160.105
Clear the Bash, VIM, and other history
-
Run this:
rm -rf ~/.viminfo ~/.Xauthority ~/.cache sudo bash -c 'rm -rf ~/.viminfo ~/.Xauthority ~/.cache' sudo bash -c 'echo -n "" > /var/log/wtmp' sudo bash -c 'echo -n "" > /var/log/btmp' sudo bash -c 'echo -n "" > /var/log/lastlog' ### These should always run last sudo bash -c 'truncate -s0 ~/.bash_history ; history -c' truncate -s0 ~/.bash_history ; history -c
Shutdown
-
Run this:
sudo shutdown -h now
Create the Template or Image
XCP-NG
Using XOA Xen Orchestra
- Go to Home → VMs
- Change the Filters to blank
- Click on your new VM
- Click on the name of the VM
- Change the name to:
TPL_D12.7.0_20240709172110TPLmeans this is a user-generated templateD12.7.0indicates this is Debian 12.7.020240709172110Indicates the revision date of THE DOCUMENT YOU ARE READING in UTC, ie 2024 July 9th, 17:21:10. This is used as a means of revision control.
- Click on Advanced
- Click Convert to template
- Click OK on the confirmation dialog
A Comparison of Common ESPHome-Compatible MMWave Prescence Sensors
Models
DFRobot C4001 (SEN0609 Variant)
Not personally evaluated, but seems to be a strong contender, especially for larger spaces
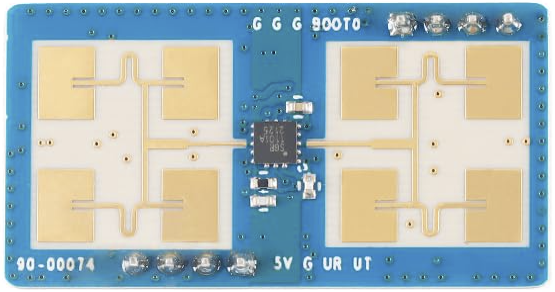
LD2450
AKA: HLK-LD2450

- Amazon: https://www.amazon.com/gp/product/B0CGNM1VLM/
- Cost ($): $9 ea. @ $45 for 5
- Features
- Prescence Detection up to 6m (19ft)
- Azimuth (L/R): ±60° (120?)
- Pitch (Up/Dn): ±35° (70?)
- Track up to 3 targets*
- Define up to 3 zones*
- 2 sensors might cover the same area and more effectively than an LD1125H, for less cost
* May be an ESPHome implementation-specific limitation that can be overcome by tweaking the lambdas
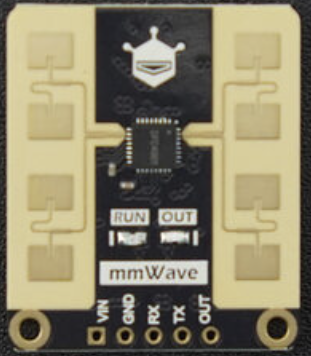
LD1125H
AKA: HLK-LD1125H-24G
- Amazon: https://www.amazon.com/EC-Buying-HLK-LD1125H-24G-Millimeter-Respiratory/dp/B0C743T4H9/
- Cost ($$$): ~$25 ea. (Might be able to be sourced cheaper via AliExpress, etc)
- Features
- Moving Body Detection up to 8m (26ft)
- Stationary Body Detection up to 4m (13ft)
- Ceiling Mounted Body Detection 2m (6.5ft) radius @ 3m (10ft) height
- Limitations
- Not cost-effective when an LD2450's range will do
- No target tracking or zones
- Movement filtering, such as for a fan, must be done by a radius range with an implementation-specific lambdaSEN0610
Getting AWS SSO to work with KeePass and Kee
The AWS SSO login page (such as those that come after the custom "acmeco.awsapps.com" domains) tend to be a bit problematic for full integration with Kee/KeePass2/. Here's my working configuration...
- Kee
- In the browser, go to the Kee options page
- This can be found by clicking the Kee extension icon, click the menu icon, then click Options (gear icon)
- Under Finding forms → Include List → Text field ID, append these options:
,awsui-input-2,awsui-input-0
- In the browser, go to the Kee options page
- KeePass
- Edit your password entry
- Go to Kee → Form fields
- Alter the username entry...
- Edit the KeePass username entry
- Set the Id field to awsui-input-0 then click Ok
- Create a text-type TOTP entry
- Click Add
- Set the Value field to {TOTP}
- Set the Id field to awsui-input-2
- Set the KeePass placeholders option to Enable then click Ok
- Create a password-type TOTP entry
- Click Add
- Set the Value field to {TOTP}
- Set the Type to Password
- Set the Id field to awsui-input-2 then click Ok
- Click OK to save the password entry
Information It may seem odd that we are adding both a text and a password type entry. It appears that AWS uses both types depending on the SSO implementation. Using both entries covers both use cases.
Tasmota Device Initial Setup
Post-configuation Tweaks
- SetOption13 1
- Disables multi-press options, making button press instantaneous
Hollyland Lark A1 Quick-Start Guide
First-time Setup
- Install the Holly Audio app
- Google Play Store (Android): https://play.google.com/store/apps/details?id=com.hollyland.larkc1
- Apple App Store (iOS): https://apps.apple.com/us/app/hollyaudio/id6443487266
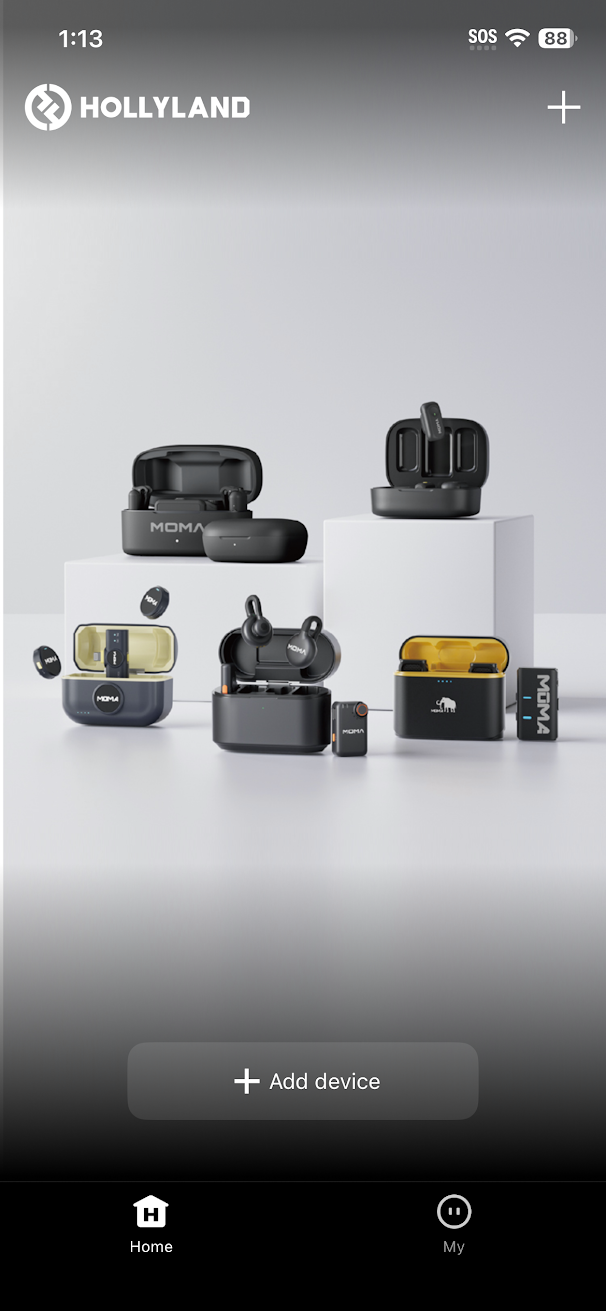
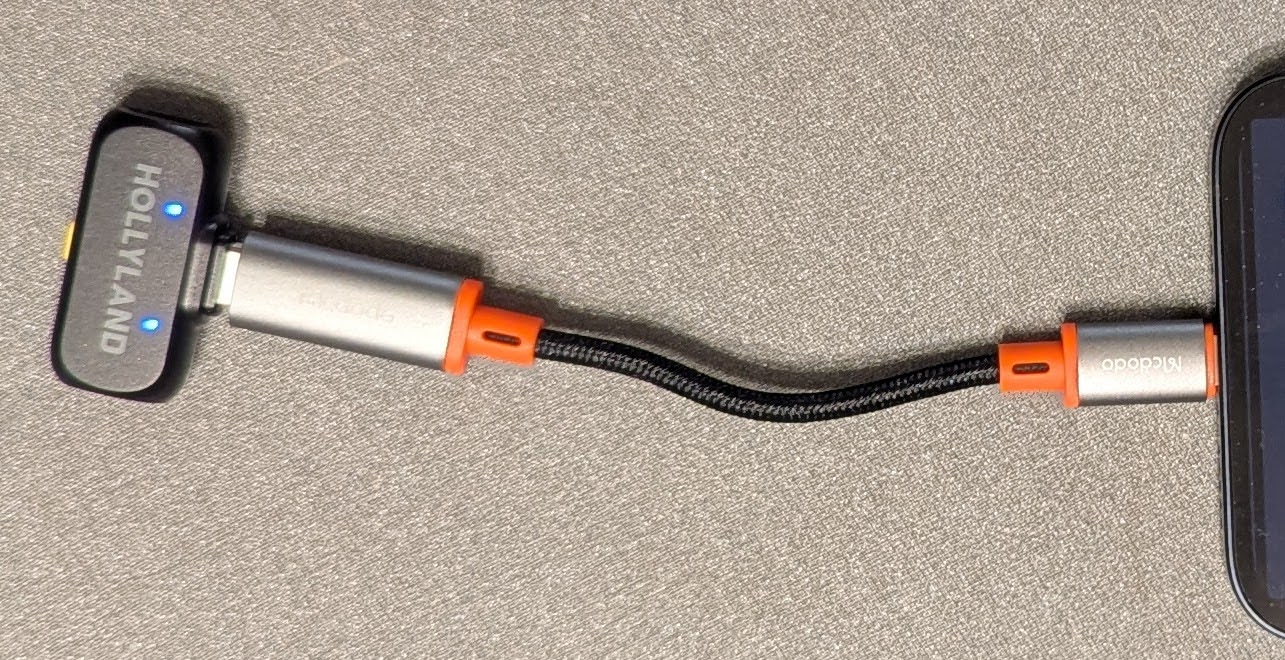
- Launch the app


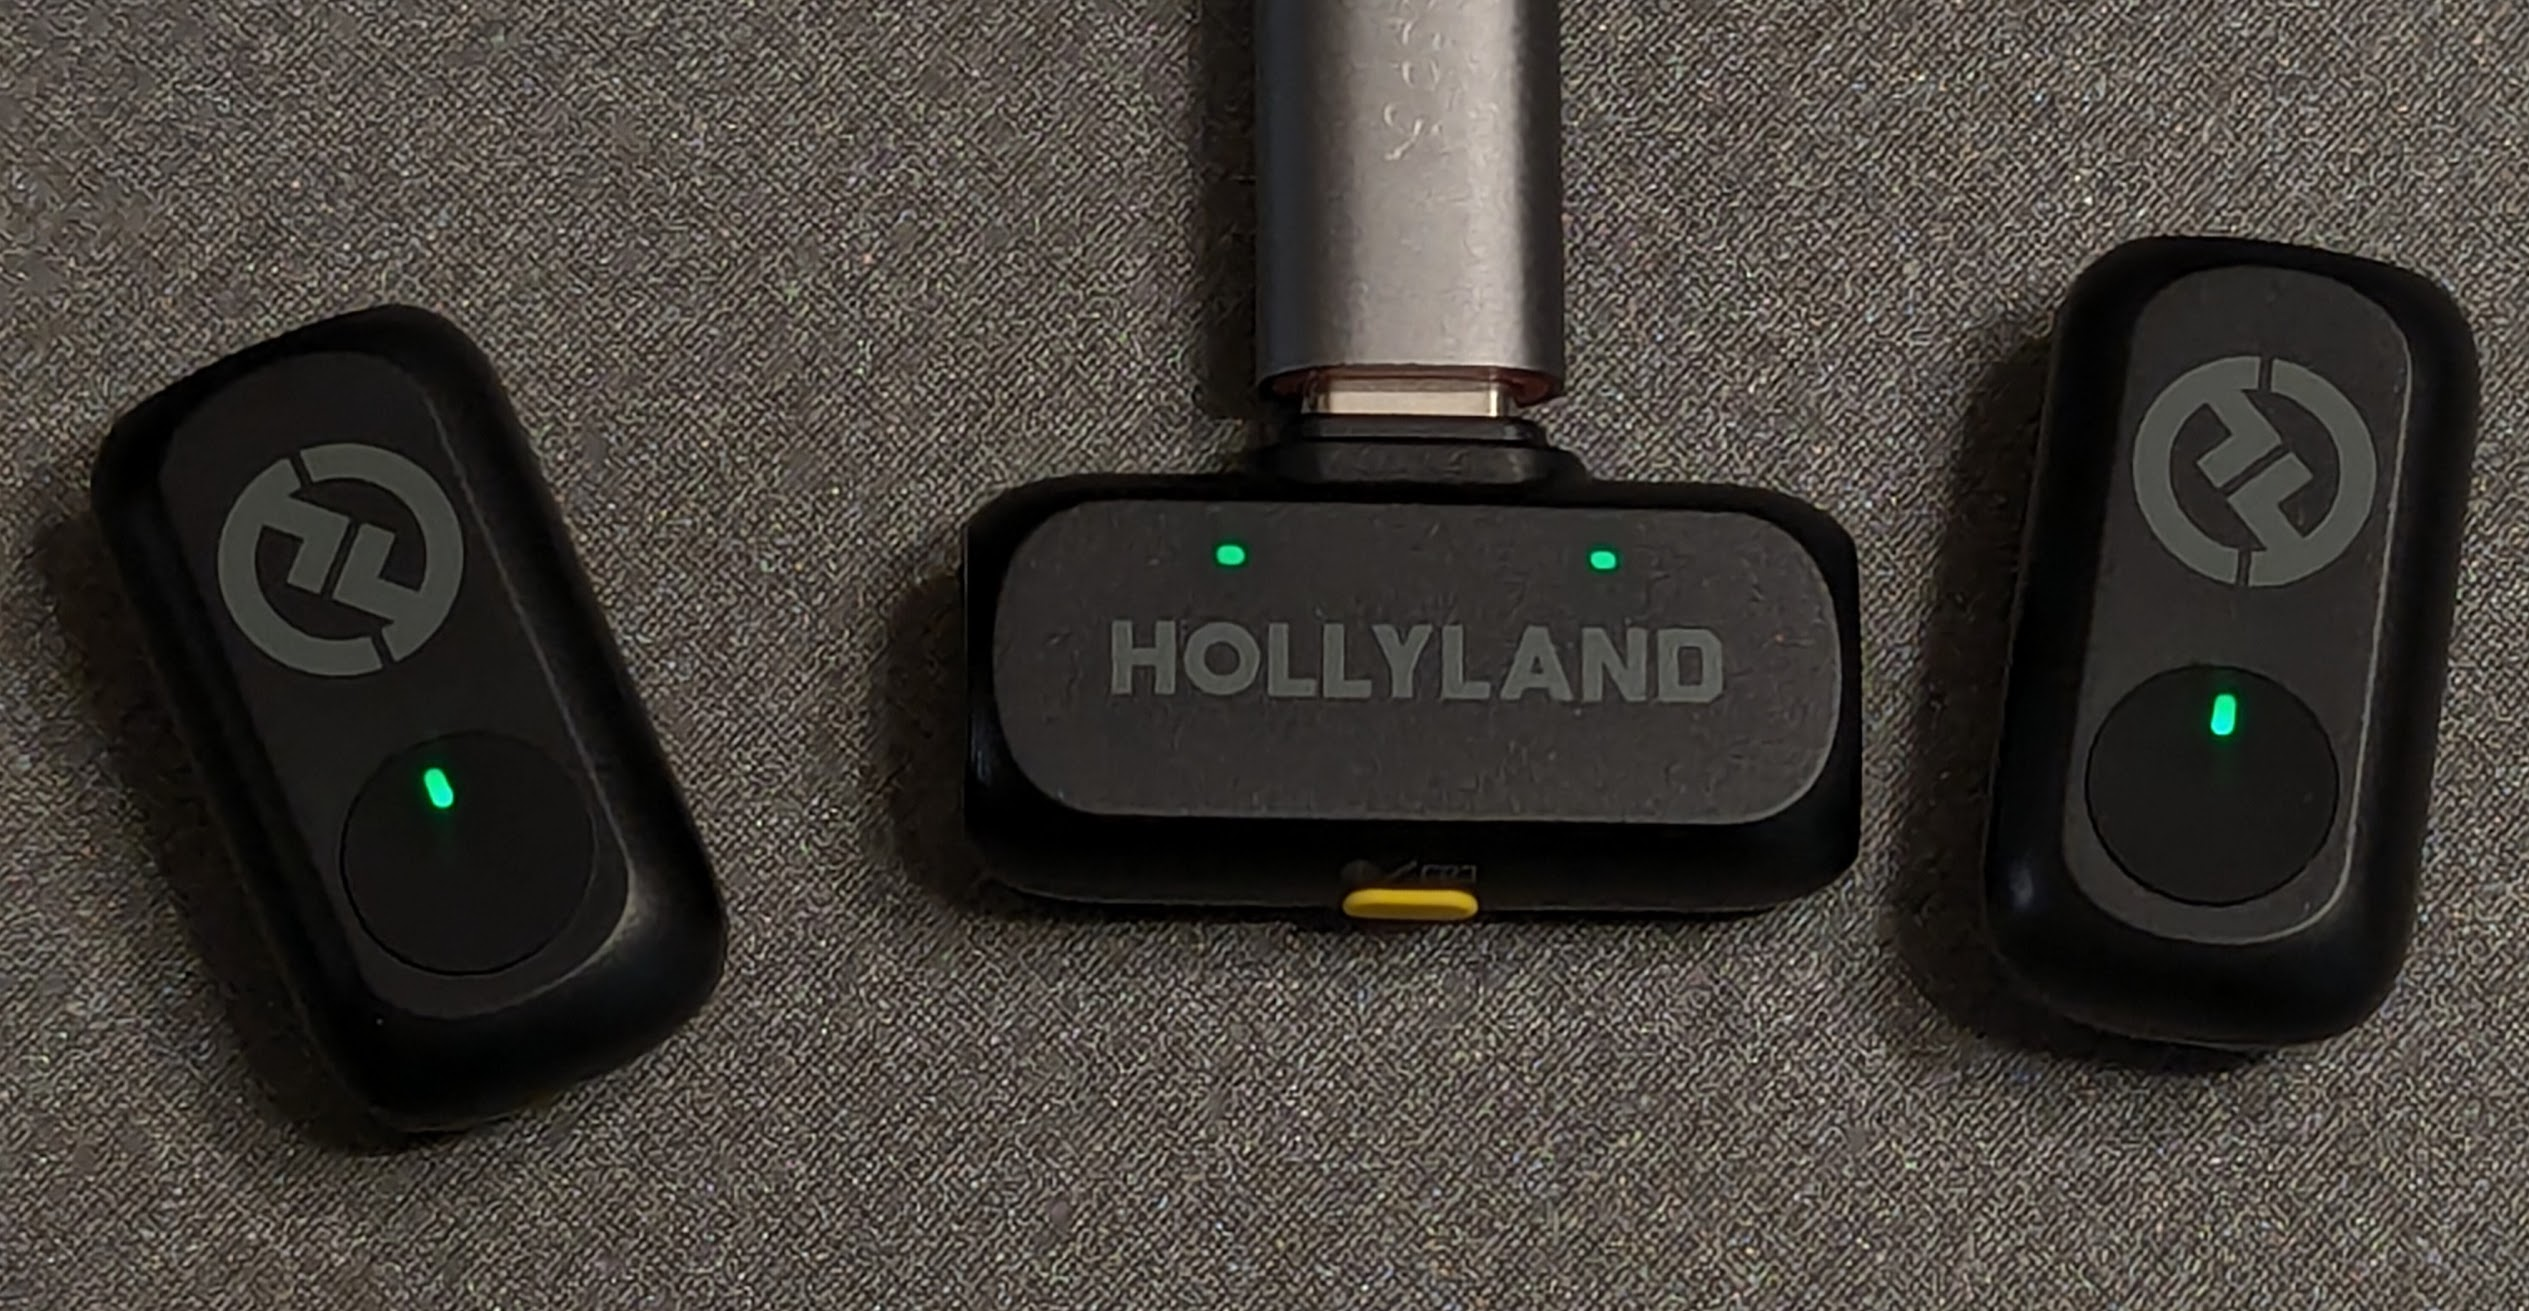
- Plug the Receiver into your phone (use the orange adapter cable on iPhones with Lightning charging ports)

-
Remove the two lapel microphones from the case. The lights on the receiver and the microphones should turn green.

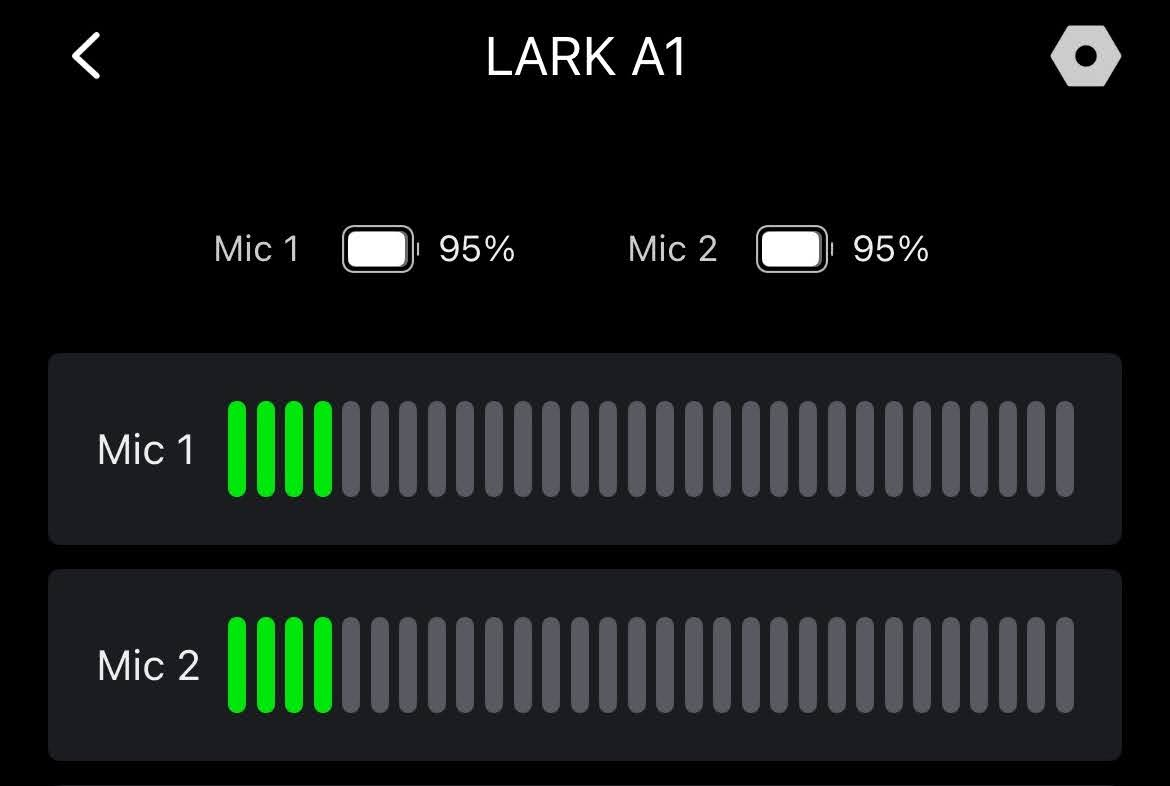
- You should now see the microphones in the Holly App. Tap on each of the mics to see the green audio meter jump and confirm they are working.

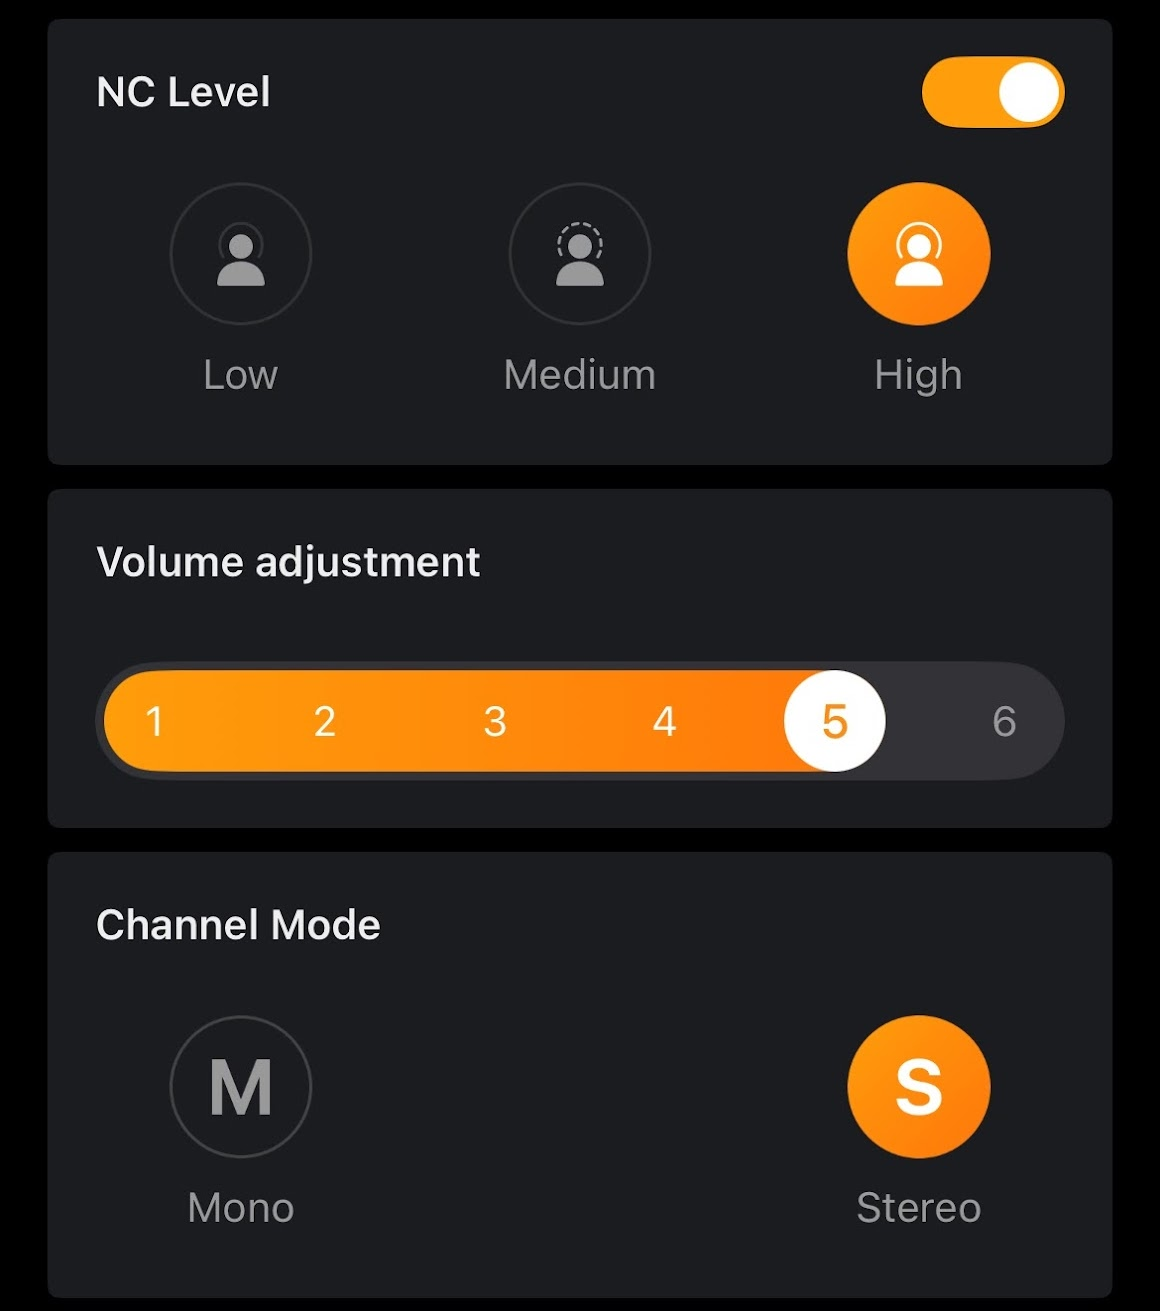
- Set the microphone mode to Stereo (S)

- The microphones should now be set up correctly for future use. You may proceed to the next section on use.

Using the Microphones
- If you have already set up the microphone app, just ensure that the microphone receiver has been plugged in as shown in the section above
- Open the Holly Audio app and ensure that the microphones are detected (green lights)
- Open your voice recorder app (or Camera if your want to record video). Your built-in voice and/or camera apps should automatically use the Hollyland microphones for sound input without additional changes.
- Both mics have a magnetic oval to clip the lapel mic onto the shirt of the person speaking. Take care when removing the microphone from the person's shirt to not lose the magnet.

- Mic placement: There are two lapel mics for stereo recording. You can either place one mic on either shoulder lapel of the person speaking, or place one mic on one person and another mic on another person to capture both sides of a conversation.

Voice Recording/Memos
Apple iOS (iPhone)
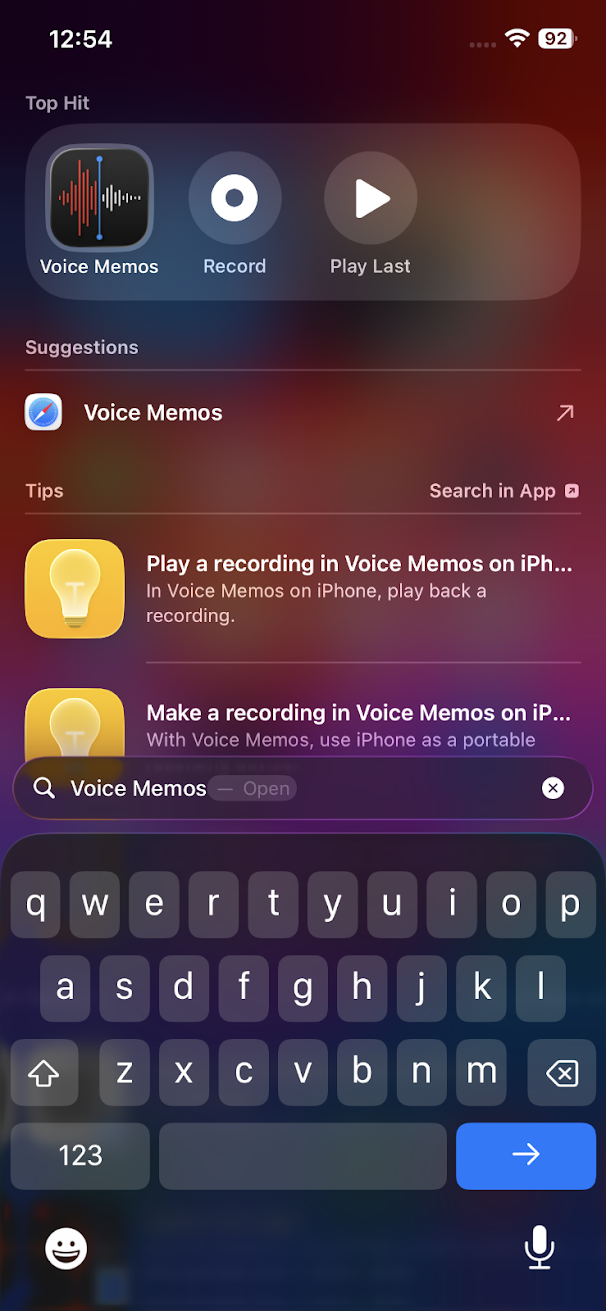
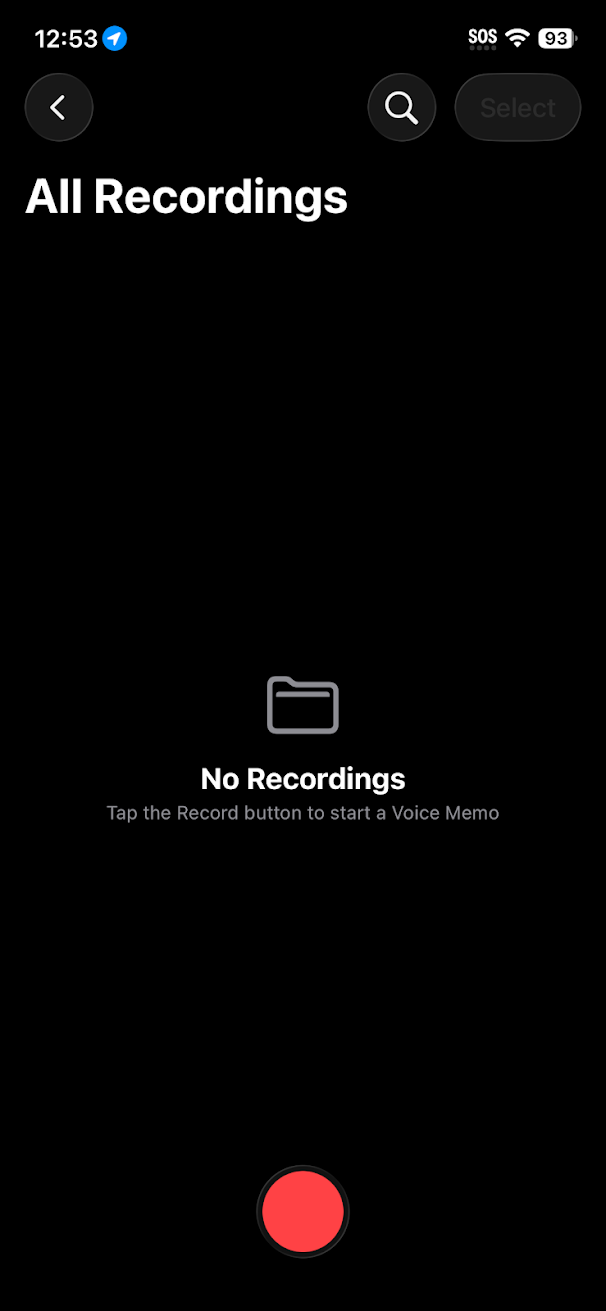
- Open search on your phone and search for "Voice Memos"

- Open the Voice Memos app
- Press the Record (red dot) button to start recording
- It is recommended that you first test each microphone and playback your test recording(s) to ensure that both microphones are working before recording important events/content.

- It is recommended that you first test each microphone and playback your test recording(s) to ensure that both microphones are working before recording important events/content.
Android
- Camera Video
- You should just be able to use your built-in camera app to record
- Voice Recorder
- Different brands may offer voice recording apps exclusive to their devices. Here are some suggested options:
- Google (Pixel): https://play.google.com/store/apps/details?id=com.google.android.apps.recorder
- Samsung (Galaxy): https://play.google.com/store/apps/details?id=com.sec.android.app.voicenote
- Others
- Different brands may offer voice recording apps exclusive to their devices. Here are some suggested options: